2025年10月25日
3D UNIVERSAL ENGLISH INSITUTE INC
info.3duniversal.com@gmail.com
8:00-17:00(Mon-Fri)
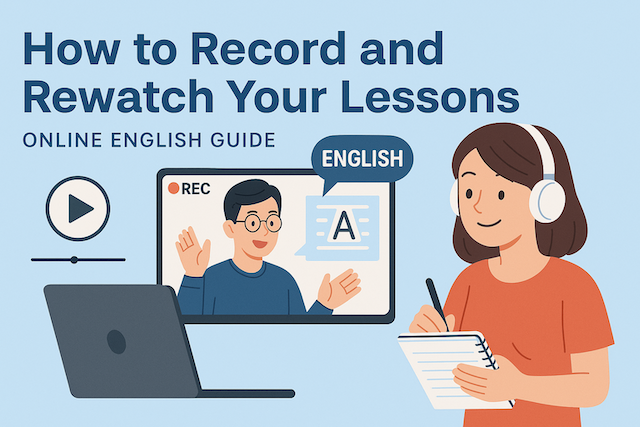
How to Record and Rewatch Your Lessons: Online English Guide
Contents
- How to Record and Rewatch Your Lessons: Online English Guide
- Why Recording Your Online English Lessons Matters
- How to Record Your Online English Lessons
- How to Rewatch and Review Your Lessons Effectively
- Organizing and Storing Lesson Recordings
- How to Use Lesson Recordings for Self-Study
- Tips for Recording Lessons Smoothly
- Common Mistakes to Avoid
- Conclusion: Make Recording Part of Your English Routine
- FAQs
- What are the benefits of recording my online English lessons?
- Do I need my teacher’s permission to record?
- Which tools are best for recording lessons?
- What should I capture—video, audio, or both?
- How can I organize my recordings so I will actually review them?
- What is the most effective way to rewatch a lesson?
- How do I take notes from replays without pausing every few seconds?
- What should I listen for when analyzing my own speaking?
- How can I use recordings to improve pronunciation?
- How often should I rewatch old lessons?
- How do I turn lesson insights into long-term memory?
- What if storage space is limited?
- Can I share my recordings?
- What if recording isn’t allowed?
- How do I know my review routine is working?
How to Record and Rewatch Your Lessons: Online English Guide
Learning English online offers flexibility, convenience, and access to global teachers — but one of the biggest missed opportunities for many students is not recording their lessons. Recording allows you to review, reflect, and reinforce what you learned, improving retention and speaking confidence. This guide explains, in detail, how to record and rewatch your online English lessons effectively, the tools you can use, and the study techniques to make the most out of your recordings.
Why Recording Your Online English Lessons Matters
Recording your lessons isn’t just about keeping a backup. It’s about creating a personal learning library that helps you progress faster.
1. Improve Your Pronunciation and Speaking Fluency
When you replay your conversations, you can identify pronunciation mistakes, awkward pauses, or overused filler words like “uh” or “you know.” Listening to yourself objectively helps you recognize your natural speaking patterns and adjust them.
2. Reinforce Vocabulary and Grammar
During live lessons, you may focus more on speaking than taking notes. Rewatching the recording gives you a second chance to write down useful words or grammar points your teacher used in real context.
3. Track Your Progress Over Time
By reviewing lessons from earlier weeks or months, you can hear how much clearer and smoother your speech has become. This boosts motivation and gives tangible proof of improvement.
4. Reduce Stress During Lessons
Knowing that your lesson is recorded lets you relax and focus on the conversation rather than worrying about missing something important.
How to Record Your Online English Lessons
There are several ways to record your online classes, depending on which platform you use (Zoom, Skype, Google Meet, or proprietary school apps). Let’s go through the most common methods.
1. Using Built-in Recording Tools
Zoom
Zoom offers a built-in recording function that’s easy to use:
-
Click “Record” on the toolbar before or during the meeting.
-
Choose between Local Recording (saves on your computer) or Cloud Recording (available for paid plans).
-
When the lesson ends, Zoom automatically processes the file and saves it as a video and audio file.
Tip: Label recordings with the lesson date and topic for better organization, e.g. “2025-10-20_Vocabulary_Food.mp4”.
Google Meet
You can record meetings if you have a Google Workspace account:
-
Click on the three dots menu → Record meeting.
-
After ending the session, the video will automatically save to your Google Drive under Meet Recordings.
Skype
For Skype:
-
Click the “+” button → Start Recording.
-
The recording is stored in the chat for 30 days and can be downloaded as an MP4 file.
2. Using Third-Party Recording Software
If your platform doesn’t have recording features (or your school restricts it), you can use external screen recorders.
OBS Studio (Free & Professional)
-
Works for Windows, macOS, and Linux.
-
Offers both video and audio capture.
-
Allows you to select screen areas and audio inputs (mic + system sound).
-
Perfect for long lessons with no time limit.
Loom
-
Browser-based recording app.
-
Lets you record screen, webcam, and microphone.
-
Great for reviewing small parts of lessons or short explanations.
-
Automatically stores recordings in the cloud for easy sharing.
Camtasia or ScreenFlow
-
Paid professional software with editing tools.
-
Useful if you want to trim, highlight, or annotate sections of your lessons.
-
Ideal for students who want polished replays for self-study or presentations.
3. Using Built-In OS Tools
If you prefer simplicity, you can use your computer’s native screen recorder:
-
Windows 10/11: Press
Win + G→ Xbox Game Bar → Start recording. -
macOS: Press
Command + Shift + 5→ Select “Record Entire Screen” or “Record Selected Portion.” -
Mobile Devices (iOS/Android): Use the default screen recording function in the quick settings menu.
Always check your teacher’s consent before recording the session. Some online schools have privacy policies that require permission first.
How to Rewatch and Review Your Lessons Effectively
Recording is only half the process — the real value comes from how you review and use those recordings.
1. Watch the Lesson in Segments
Instead of rewatching the full 60-minute session, divide it into shorter parts:
-
First 15 minutes: Warm-up conversation (good for pronunciation practice).
-
Middle section: Main grammar or topic discussion (take notes).
-
Last 10 minutes: Corrections and teacher feedback (focus on improvement).
2. Take Detailed Notes
Create a “Lesson Replay Notebook” (digital or paper). For each video:
-
Write the date, topic, and new words.
-
Note down phrases your teacher used naturally.
-
Add grammar corrections you received.
-
Highlight speaking mistakes to avoid next time.
Example:
Lesson: 2025-10-18 – Talking About Hobbies
Vocabulary: “spare time”, “take up a new hobby”
Correction: “I like to do hiking” → “I like hiking”
Goal: Practice “used to” next lesson
3. Shadow the Teacher’s Speech
Shadowing means listening and speaking along simultaneously. Replay your teacher’s explanations or sample dialogues and mimic their rhythm, tone, and pronunciation. This builds natural fluency and intonation.
4. Focus on Weak Points
Use your recordings to identify recurring problems:
-
Are you repeating the same grammar errors?
-
Do you hesitate too much before speaking?
-
Are you misunderstanding certain accents or vocabulary?
Rewatch only those specific parts and re-practice them until improved.
Organizing and Storing Lesson Recordings
Having multiple recordings can quickly become chaotic. Follow these organization tips to keep everything tidy and easy to access.
1. Folder System
Create folders by month or topic:
2. Use Cloud Storage
Store your recordings safely using:
-
Google Drive
-
Dropbox
-
OneDrive
-
iCloud
Cloud storage ensures your files are safe even if your laptop is lost or damaged. You can also access them anywhere.
3. Add Notes or Tags
If you use Google Drive or Notion, add short notes in the description field like:
“Focus: Present Perfect / pronunciation of ‘th’ sound.”
This helps when searching for lessons later.
How to Use Lesson Recordings for Self-Study
1. Build a Personalized Review Routine
-
Weekly: Rewatch one lesson and take notes.
-
Monthly: Select your best and worst lessons, compare progress.
-
Quarterly: Compile your top 10 improvements and record a self-evaluation video.
2. Create a Learning Journal
Use a Google Doc or Notion page to log:
-
Mistakes you’ve corrected.
-
Expressions you’ve mastered.
-
Goals for the next week.
3. Combine Recordings with AI Tools
You can upload your audio to tools like:
-
Whisper or Otter.ai: Automatically transcribes your lessons.
-
Grammarly or ChatGPT: Helps you analyze your spoken grammar.
-
Anki or Quizlet: Convert new vocabulary into flashcards.
Send short clips (1–2 minutes) from your replays to your teacher and ask for feedback like:
“Can you check my pronunciation in this section?”
“Is my answer here grammatically correct?”
This creates a loop of continuous improvement.
Tips for Recording Lessons Smoothly
-
Check audio and mic settings before each class.
-
Use headphones to prevent feedback or echo.
-
Close background apps to avoid lag during recording.
-
Ensure enough storage space (especially for HD video).
-
Back up files regularly on a cloud drive.
Common Mistakes to Avoid
-
Recording without permission – always confirm with your teacher.
-
Saving files with random names – label them clearly.
-
Never rewatching recordings – use them consistently for review.
-
Recording poor-quality audio – ensure your mic and environment are clear.
-
Watching passively – take notes and speak along to internalize learning.
Conclusion: Make Recording Part of Your English Routine
Recording and rewatching your online English lessons transforms your learning process from passive to active. You not only reinforce lessons but also build a personal archive of your language journey. The ability to listen to your own voice, correct errors, and notice improvement over time creates long-term motivation and measurable results.
Whether you’re using Zoom, Skype, or another platform, the key is consistency: record, review, and reflect. Within a few months, you’ll notice better pronunciation, stronger confidence, and faster progress — all from using your lessons more effectively.
FAQs
What are the benefits of recording my online English lessons?
Recording creates a reusable study asset. You can revisit explanations, catch pronunciation details you missed live, and extract vocabulary and grammar in context. Rewatching also reduces cognitive load during class—since you aren’t rushing to write everything down—and lets you track progress over weeks and months. Many learners report faster improvement because they transform one live lesson into multiple targeted review sessions.
Do I need my teacher’s permission to record?
Usually, yes. Always ask before recording. Some schools and platforms require explicit consent due to privacy policies. A simple message—“May I record for personal study only?”—is professional and transparent. If recording is not permitted, ask whether the teacher can provide a short recap or key points after class.
Which tools are best for recording lessons?
If your platform supports it, use built-in recorders (e.g., Zoom, Google Meet, Skype). For universal solutions, screen recorders such as OBS Studio (free), Loom (cloud), or Camtasia/ScreenFlow (paid with editing tools) work well. On Windows, the Xbox Game Bar can record quickly; on macOS, use the built-in screen capture (Command+Shift+5). Mobile devices also have native screen recording.
What should I capture—video, audio, or both?
Both are ideal. Video preserves teacher gestures, slides, and whiteboard notes; audio preserves pronunciation cues and intonation. If storage is a concern, record video at a lower resolution (720p) or capture audio-only for conversation-focused sessions.
How can I organize my recordings so I will actually review them?
Use a consistent naming scheme and folder structure. Include the date, topic, and level, such as “2025-10-20_Present-Perfect_B1.mp4.” Store files in month-based folders and back them up to cloud storage. Keep a companion note file (Google Docs or Notion) with a link to each video, a 3-line summary, and tags like “pronunciation,” “phrasal verbs,” or “interview practice.”
What is the most effective way to rewatch a lesson?
Review in short, focused bursts. First, skim the video at 1.25× speed to map the sections. Then deep-review just the important parts: explanations, corrections, and your own speaking turns. Pause to capture target phrases, and replay tricky segments until you can reproduce them accurately.
How do I take notes from replays without pausing every few seconds?
Use a two-pass method. On the first pass, jot quick bullets only. On the second pass, refine them into example sentences and mini-drills. If possible, generate an automatic transcript (e.g., using speech-to-text), then highlight corrections and copy key lines into spaced-repetition flashcards.
What should I listen for when analyzing my own speaking?
Focus on four layers: sounds (individual phonemes like /θ/), prosody (stress and intonation), grammar accuracy (articles, tense consistency), and discourse (cohesion and filler control). Track recurring issues in a “mistake log,” then design micro-drills: ten repetitions of a corrected sentence, or a 60-second monologue applying the target pattern.
How can I use recordings to improve pronunciation?
Try shadowing: play a 10–20-second teacher segment and speak along in real time, matching rhythm and stress. Then do “call-and-echo”: pause after each sentence and imitate it. Record your imitation, compare waveforms or timing, and iterate. Prioritize connected speech (linking and reductions) for natural flow.
How often should I rewatch old lessons?
A practical cadence is weekly, monthly, and quarterly. Each week, rewatch one recent lesson for targeted corrections. Each month, compare an early and a recent clip to hear progress. Each quarter, compile highlights into a short self-assessment video summarizing gains and next goals.
How do I turn lesson insights into long-term memory?
Convert new items into flashcards with context: front = prompt or gap sentence; back = model answer + audio snippet if available. Schedule spaced repetition. Add “production” cards that require you to speak for 20–30 seconds using the target grammar or 3 new phrases in a single answer.
What if storage space is limited?
Record at 720p, compress with a standard codec, and trim videos to essential segments. Archive full sessions for one month, but keep permanently only curated highlights—your best explanations, key corrections, and representative speaking samples.
Treat recordings as private study materials unless your teacher and classmates have agreed to share. If you need feedback, share short clips (60–120 seconds) that contain a specific question (e.g., “Please check my intonation here.”). Remove personal data before sharing.
What if recording isn’t allowed?
Request alternative supports: the teacher’s slides, a summary email, or permission to take audio-only notes of your own speech. You can also write a live “lesson log” during class with timestamps (“00:18:45 – past perfect explanation”) to quickly revisit the topic through provided materials afterward.
How do I know my review routine is working?
Track three metrics: reduced correction frequency on the same issue, faster response time in speaking tasks, and higher accuracy in retellings. Every four weeks, record a 1-minute response to the same prompt and compare against your earlier versions to check clarity, pace, and confidence.
Online English Learning Guide: Master English Anytime, Anywhere

How to Register for eTravel Philippines (2025 Guide)
Step-by-step guide to completing your eTravel registration before arriving in the Philippines, with images and tips.

Night Market in Cebu – Things You Don’t Know About Cebu Life
Discover the hidden charm of Cebu’s night markets, from street food stalls to local life tips you won’t find in tourist guides.
How to Use ChatGPT for IELTS Preparation: A Complete Guide
Learn how to prepare for IELTS using ChatGPT — including strategies for Writing, Reading, Listening, Speaking, and grammar support.

How to Build a Website Without Coding Using ChatGPT
Discover how to build your own website using AI—no coding skills needed. From structure planning to SEO and design, let ChatGPT guide you.