2026年4月3日
3D UNIVERSAL ENGLISH INSITUTE INC
info.3duniversal.com@gmail.com
8:00-17:00(Mon-Fri)
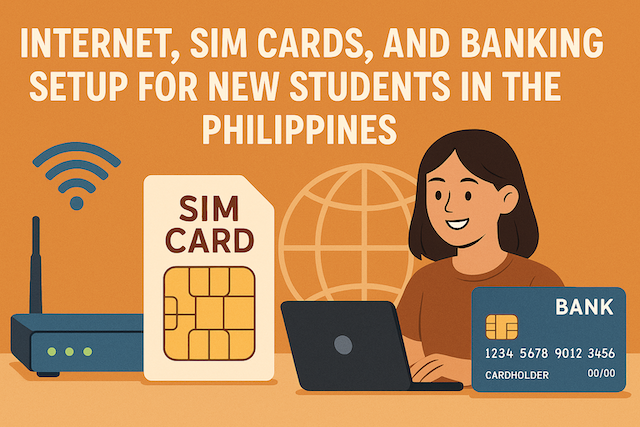
Internet, SIM Cards, and Banking Setup for New Students in the Philippines
Contents
- Internet, SIM Cards, and Banking Setup for New Students in the Philippines
- Getting Connected: Internet Options for Students
- SIM Cards and Mobile Data Setup
- Online Tools for Communication
- Opening a Bank Account in the Philippines
- Mobile Banking and E-Wallets
- Managing Finances and Budgeting as a Student
- Tips for Staying Connected Safely
- Getting Help and Customer Support
- Final Thoughts
- FAQs
- What documents do international students need to buy and register a Philippine SIM?
- Should I choose prepaid or postpaid for mobile service?
- Which provider is best for students: Globe, Smart, or DITO?
- Can I use an eSIM in the Philippines?
- What are typical student-friendly data promos?
- How do I set up home internet in a dorm or condo?
- What speeds and costs should I expect for home internet?
- Can I open a Philippine bank account as a foreign student?
- What if I don’t have an ACR I-Card yet?
- How do I use GCash or Maya without a local bank account?
- Can I link a foreign card or receive money from abroad?
- How much are ATM and transfer fees?
- How can I keep my accounts and number secure?
- What should I do if I lose my phone or SIM?
- Are there workarounds if my building’s signal is weak?
- How do I prove my address if bills aren’t in my name?
- Can I keep my number if I switch networks?
- What customer support channels should I save?
- Any quick setup checklist for my first week?
Internet, SIM Cards, and Banking Setup for New Students in the Philippines
For international students moving to the Philippines, setting up essential services like internet, SIM cards, and banking is one of the first steps toward a comfortable and connected student life. Reliable connectivity and financial accessibility can make a huge difference in how smoothly your transition goes. This guide explains everything you need to know about setting up internet, mobile services, and bank accounts in the Philippines, with practical recommendations and student-friendly tips.
Getting Connected: Internet Options for Students
Home Wi-Fi and Broadband Internet
If you’re living in a dorm, apartment, or condo, you’ll want to set up a reliable home Wi-Fi connection. The major internet service providers (ISPs) in the Philippines are:
-
PLDT Home – Offers high-speed fiber plans, ideal for students attending online classes or doing video calls.
-
Globe At Home – Known for flexible prepaid broadband options, suitable for shared apartments or short-term stays.
-
Converge ICT – Popular among students for its affordable fiber internet with consistent performance in cities like Cebu and Manila.
-
Sky Broadband – Provides bundled internet and cable TV plans, though service availability can be limited outside urban areas.
Internet Speeds and Costs
Average speeds in major cities (Manila, Cebu, Davao) range from 50 to 200 Mbps for fiber plans. Expect to pay around ₱1,500–₱2,500 per month for a midrange plan. Most ISPs require valid identification, proof of address, and sometimes a school enrollment certificate for account setup.
If you’re renting a dorm or condo, check first whether the unit already includes Wi-Fi service—many student accommodations provide shared internet at no extra cost.
Pocket Wi-Fi for Flexibility
If you move frequently or stay in temporary housing, pocket Wi-Fi is a good option. Providers like Globe, Smart, and DITO sell portable Wi-Fi devices for about ₱1,000–₱2,000, and you can load data packages as needed.
These devices are convenient for students who travel between cities or use internet outside of class hours, though speeds may vary depending on signal strength.
SIM Cards and Mobile Data Setup
Choosing the Right SIM Provider
The Philippines has three main telecom operators:
-
Globe Telecom – Great coverage in urban areas and campuses. Ideal for students who use data for social media, calls, and online classes.
-
Smart Communications – Known for wide coverage, even in remote provinces. Offers many student-friendly prepaid data promos.
-
DITO Telecommunity – Newer and budget-friendly, with fast 5G data in selected cities, including Cebu and Davao.
How to Get a SIM Card
You can buy SIM cards at the airport, convenience stores, or official retail shops for ₱50–₱100.
Since 2023, all SIM cards must be registered under your name under the SIM Registration Act.
To register, you’ll need:
-
A valid passport or student ID
-
A local address or dorm address
-
Access to the internet to complete online registration (links are usually provided on the provider’s website)
If you’re not yet familiar with local procedures, it’s easiest to buy and register your SIM card at an official shop or service center, where staff can assist you.
Prepaid vs. Postpaid Plans
-
Prepaid: Most students prefer prepaid SIMs because they don’t require contracts. You can load credit using GCash, PayMaya, or convenience stores.
-
Postpaid: If you stay long-term (1 year or more) and need a consistent data plan, postpaid might be worth it. You’ll need an Alien Certificate of Registration (ACR I-Card) and proof of residence.
Recommended Data Promos for Students
-
Globe Go+99 – ₱99 for 7 days, includes 8 GB data for all sites.
-
Smart GIGA Video 99 – ₱99 for 7 days, includes 2 GB/day for video and class-related apps.
-
DITO Level-Up 99 – ₱99 for 30 days with 10 GB data and unlimited texts.
You can easily reload data via GCash, GrabPay, 7-Eleven CLiQQ, or SM Department Stores.
Online Tools for Communication
Once you have data access, you’ll want to set up key communication apps used by locals and schools:
-
Facebook Messenger – The most widely used messaging app in the Philippines, even for official school announcements.
-
Viber or WhatsApp – Often used for group chats with classmates.
-
Zoom and Google Meet – For online lectures and group discussions.
-
Telegram – Popular among international student groups.
Make sure your number and email are consistent across all accounts to avoid login issues or missing school updates.
Opening a Bank Account in the Philippines
Why You Need a Local Bank Account
Having a Philippine bank account makes managing money easier. You can pay rent, utilities, tuition, and receive remittances or allowance from abroad without high international fees. It’s also necessary for connecting to local e-wallets like GCash or Maya.
Basic Requirements for International Students
Most banks allow foreign students to open an account if they meet these requirements:
-
Valid passport
-
ACR I-Card (Alien Certificate of Registration)
-
Proof of enrollment from your university or language school
-
Proof of local address, such as a dorm contract or billing statement
Some banks might ask for a minimum initial deposit, typically ₱1,000–₱5,000 depending on the account type.
Recommended Banks for Students
-
BDO (Banco de Oro) – Has branches and ATMs across the country, great for convenience.
-
BPI (Bank of the Philippine Islands) – Offers mobile banking and GCash linking.
-
Metrobank – Reliable online banking features and foreign currency accounts.
-
Land Bank of the Philippines – Accepts student accounts with minimal requirements, especially for state university students.
-
Security Bank – Offers digital accounts you can open via app, perfect for tech-savvy students.
Tip: Bring both your passport and school ID when visiting a branch. Not all tellers are familiar with foreign student processes, so ask for the New-to-Bank or Student Account Desk.
Mobile Banking and E-Wallets
GCash
GCash is the most popular e-wallet in the Philippines. It allows you to:
-
Pay bills and tuition online
-
Reload your SIM or buy data packages
-
Send and receive money instantly
-
Pay for Grab rides, food delivery, and even groceries
You can register using your Philippine SIM card and valid ID. Some features may be limited until you verify your account, which requires an ACR card or passport photo upload.
Maya (formerly PayMaya)
Maya is another e-wallet option with a built-in virtual Visa card. It’s widely accepted for online purchases, making it useful for students who don’t have a credit card yet.
Linking Bank Accounts to E-Wallets
Most banks (BDO, BPI, Metrobank, Security Bank) allow direct transfers to and from GCash and Maya with low or no fees. Once linked, you can use your mobile wallet for almost all daily transactions.
Managing Finances and Budgeting as a Student
ATM and Withdrawal Tips
-
ATMs are widely available, but always withdraw from machines inside malls or campuses for safety.
-
Daily withdrawal limits are typically ₱20,000–₱50,000.
-
Foreign debit cards (Visa/Mastercard) can be used but may incur ₱250–₱300 fees per withdrawal.
Budget Management Apps
You can track your spending with apps like Money Lover, Wallet, or GCash Insights. Many students set a weekly spending limit of ₱1,500–₱3,000 for food, transportation, and data, depending on their location.
Tips for Staying Connected Safely
Protect Your SIM and E-Wallet
-
Don’t share your OTP (One-Time Password) with anyone.
-
Avoid using public Wi-Fi for online banking.
-
Use a strong PIN or biometric lock on your GCash or Maya app.
Internet Security for Students
If you’re doing online research or financial transactions, consider installing a VPN or using your school’s secure network. It’s also smart to keep backups of important documents on Google Drive or Dropbox.
Getting Help and Customer Support
If you encounter issues with your SIM, internet, or bank account:
-
Visit the nearest service center or bank branch in person.
-
Keep a copy of your passport, student ID, and proof of residence ready.
-
For urgent concerns, customer hotlines are available:
-
Globe: 211 (free for Globe users)
-
Smart: *888 (free for Smart users)
-
GCash: help.gcash.com
-
BDO: (02) 8631-8000
-
Final Thoughts
Setting up internet, SIM cards, and banking in the Philippines may seem overwhelming at first, but it’s quite straightforward once you know where to start. Within your first few days, prioritize buying a local SIM, setting up GCash, and confirming your Wi-Fi or pocket Wi-Fi connection.
For banking, wait until you have your student ID or ACR I-Card, then open a local account for easier money management.
With these essentials in place, you’ll stay connected, financially secure, and ready to enjoy your student life in the Philippines with confidence.
FAQs
What documents do international students need to buy and register a Philippine SIM?
You will need a valid passport, your local address (dorm or condo), and internet access to complete the online SIM Registration Act form. Some counters also accept a student ID or enrollment certificate as a supporting document. If you buy your SIM at an official store or airport kiosk, staff can help you register on the spot.
Should I choose prepaid or postpaid for mobile service?
Most students choose prepaid because it is flexible, cheap, and requires no long-term contract. You simply load data promos as needed. Postpaid can be good for stays of 12 months or more, but expect stricter requirements like an Alien Certificate of Registration (ACR I-Card), proof of income or sponsor, and proof of address.
Which provider is best for students: Globe, Smart, or DITO?
Coverage varies by city and even by neighborhood. Globe is strong in many campuses and urban areas, Smart often reaches farther in provincial zones, and DITO offers budget-friendly 4G/5G where available. Ask classmates which network works in your building. If you study or live in multiple areas, consider a dual-SIM phone or keep a backup pocket Wi-Fi.
Can I use an eSIM in the Philippines?
Yes, many newer phones support eSIM on major providers. You can scan a QR code at a telco shop or sometimes purchase eSIM profiles online. eSIM is convenient if you do not want to swap physical SIMs, but verify that your phone model and Philippine carrier both support eSIM before you rely on it.
What are typical student-friendly data promos?
Expect weekly or monthly data bundles around ₱99–₱299 that include general data plus app-specific allocations (e.g., social, video, or study platforms). Read the promo details carefully for data caps, app restrictions, and validity. You can top up via convenience stores, kiosks, or e-wallets like GCash and Maya.
How do I set up home internet in a dorm or condo?
First, check if your unit already has service. If not, ask the landlord which fiber providers serve the building. When applying, you’ll need government ID, proof of address (lease or billing), and sometimes an enrollment certificate. For short stays or shared units, a prepaid “no-install” home Wi-Fi kit or pocket Wi-Fi may be easier.
What speeds and costs should I expect for home internet?
In major cities, entry-level fiber plans typically range from 50–200 Mbps, with monthly fees around ₱1,200–₱2,500. Non-fiber or wireless options may be cheaper but less consistent in peak hours. If you have heavy video calls or uploads, prioritize fiber and ask about latency and fair-use policies.
Can I open a Philippine bank account as a foreign student?
Yes. Bring your passport, ACR I-Card (or bank-accepted alternative), proof of enrollment, and proof of local address. Minimum opening deposits vary (often ₱1,000–₱5,000). Not all branches are familiar with student onboarding; if you’re refused, try a larger branch or the bank’s “new-to-bank” desk.
What if I don’t have an ACR I-Card yet?
Some banks may allow initial or basic accounts using your passport and school letter while your ACR is in process, but policies vary by bank and branch. Another option is to start with an e-wallet (GCash or Maya) using your SIM and passport, then upgrade or link a bank later once your ACR arrives.
How do I use GCash or Maya without a local bank account?
Register with your Philippine number, verify your identity with your passport (and later ACR for higher limits), and cash in at convenience stores, remittance partners, or over-the-counter bank deposits. Many schools, landlords, and shops accept e-wallet payments, and you can also buy load, pay bills, and transfer funds.
Can I link a foreign card or receive money from abroad?
Some e-wallets support limited card linking, but success varies by issuer. For regular remittances, consider international money transfer services that deliver to local banks or e-wallets. Always compare exchange rates and fees. If you’ll receive funds monthly, a local bank account generally reduces costs and friction.
How much are ATM and transfer fees?
With a local card, ATM withdrawals at your bank are often free; interbank withdrawals typically have small fees. Foreign cards usually incur ₱250–₱300 per withdrawal plus issuer fees. E-wallet to bank transfers can be free during promos, but expect standard interbank fees (InstaPay/PESONet) outside promos.
How can I keep my accounts and number secure?
Never share one-time passwords (OTPs). Enable biometrics and a strong PIN on your e-wallet and banking apps. Avoid public Wi-Fi for financial transactions; tether from mobile data if possible. Keep your SIM registered and updated, and store backups of IDs on encrypted cloud storage. Consider a VPN for extra privacy.
What should I do if I lose my phone or SIM?
Immediately suspend your SIM via the telco hotline and freeze your e-wallet/bank apps. Once you have a replacement SIM (with the same number, if possible), restore access using recovery emails, security questions, or in-branch verification. Keep copies of your SIM serial number, account numbers, and support hotlines in a secure place.
Are there workarounds if my building’s signal is weak?
Try a different provider, move your router near a window, or use an external LTE/5G modem with better antennas. For fiber, request a proper router placement during installation. In shared units, set QoS (Quality of Service) or schedule heavy downloads off-peak to preserve stability for classes and calls.
How do I prove my address if bills aren’t in my name?
Ask your landlord or dorm for a signed certification or lease contract showing your name, unit, and dates. Some banks accept school letters confirming residence. Bring multiple supporting documents (lease, student ID, enrollment letter) to improve your chances of approval.
Can I keep my number if I switch networks?
Yes, mobile number portability (MNP) allows you to move your number between networks if you meet the criteria (e.g., no outstanding balance, active SIM). Visit a carrier shop for a step-by-step porting process; expect identity checks and brief downtime during the switch.
What customer support channels should I save?
Save your telco’s hotline, e-wallet help center URL, and your bank’s 24/7 number. Many providers also offer in-app chat and official social media support. When contacting support, have your account number, ID, and recent transaction details ready to speed up verification.
Any quick setup checklist for my first week?
- Buy and register a local SIM; test coverage in your room.
- Set up GCash or Maya and verify your account.
- Decide on home internet (fiber if possible; pocket Wi-Fi if short-term).
- Gather documents for banking (passport, ACR, enrollment, address proof).
- Enable app security (PIN/biometrics) and learn to spot OTP scams.
- Back up IDs, passwords, and support contacts securely.
Philippines University Guide: Top Universities, Admissions, Scholarships, and Student Life

How to Register for eTravel Philippines (2025 Guide)
Step-by-step guide to completing your eTravel registration before arriving in the Philippines, with images and tips.

Night Market in Cebu – Things You Don’t Know About Cebu Life
Discover the hidden charm of Cebu’s night markets, from street food stalls to local life tips you won’t find in tourist guides.
How to Use ChatGPT for IELTS Preparation: A Complete Guide
Learn how to prepare for IELTS using ChatGPT — including strategies for Writing, Reading, Listening, Speaking, and grammar support.

How to Build a Website Without Coding Using ChatGPT
Discover how to build your own website using AI—no coding skills needed. From structure planning to SEO and design, let ChatGPT guide you.